Super simple PVC hula hoops
The other day my sister called me up and asked if I could help her make some hula hoops to donate to the school her kids go to. When we were kids we were always hula hooping and jumping rope on the play ground, but she had seen there was a lack of materials for the school. So being the awesome generous person she is she wanted to give the kids new playground activities.
This is where I come in to the picture. Rather than spend a ton of money buying cheap commercial made hula hoops she wanted to make them. I love making hula hoops because it is really easy and in just minutes you have a fun product.
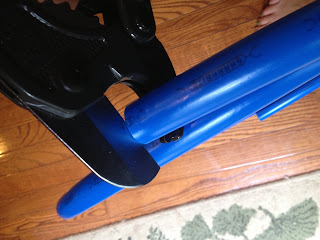
We went to the hardware store to pick up some PVC pipe, connector, and electrical tape. While you are there is you don't have a PVC pipe cutter I recommend picking a set up. They are around $12 and it makes the cutting process quick and painless. A roll of PVC goes further than you would think. We bought a 100 foot roll and made 12 hoops. I love that you can get blue and red piping because it makes it so much easier to make them fun and colorful.
So once you get your supplies it is time for the fun to start. You can make the hoop as big or small as you please. For this project I knew the hoops where for young kids so I made them a little smaller than I made my personal hoop, but I can still use this size. In general the bigger the hoop the easier it is to keep going. If you are wanting to learn to do tricks a bigger hoop will be better. So I decided on my size and cut the whole roll of PVC to match.
 If you don't have a PVC cutter you can use a hand saw but it will take more time, and it is harder to make the cuts straight. The more even you cut is the easier it will be to match up the hoop later.
Once you pipe is cut it is time to use your connectors to form the ring. We were using 3/4in tubing so I found the plastic double connector for 3/4in. You want to make sure to double check that your sizes match up before you start. The connector should be able to pop right into your tubing snugly.
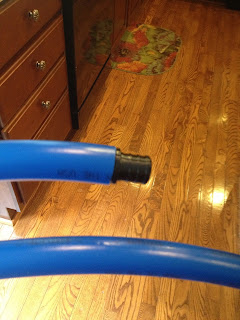
If you can not get your connector in right away don't panic! Microwave a cup of water and dip the piping into the hot water. The heat will make the tube expand and you should be able to push the connector in. Once you have one side of the connector filled bend the piping around and put it on the second side. then yahoo you have made your hoop!
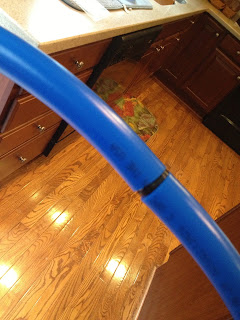
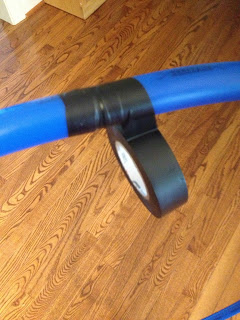
To secure the connection of the hoop you can use any color electrical tape (I have also used duct tape before but it isn't as smooth a finish). Start by taping around the joint and then begin pulling at an angle to make stripes all around the hoop. You can use more that one color or keep it simple. It is all up to you.

In about twenty minutes we have made all 12 hoops and were ready to send them off to the school for the kids to enjoy.

Happy Hooping! More to come soon.
This is where I come in to the picture. Rather than spend a ton of money buying cheap commercial made hula hoops she wanted to make them. I love making hula hoops because it is really easy and in just minutes you have a fun product.
We went to the hardware store to pick up some PVC pipe, connector, and electrical tape. While you are there is you don't have a PVC pipe cutter I recommend picking a set up. They are around $12 and it makes the cutting process quick and painless. A roll of PVC goes further than you would think. We bought a 100 foot roll and made 12 hoops. I love that you can get blue and red piping because it makes it so much easier to make them fun and colorful.
So once you get your supplies it is time for the fun to start. You can make the hoop as big or small as you please. For this project I knew the hoops where for young kids so I made them a little smaller than I made my personal hoop, but I can still use this size. In general the bigger the hoop the easier it is to keep going. If you are wanting to learn to do tricks a bigger hoop will be better. So I decided on my size and cut the whole roll of PVC to match.

Once you pipe is cut it is time to use your connectors to form the ring. We were using 3/4in tubing so I found the plastic double connector for 3/4in. You want to make sure to double check that your sizes match up before you start. The connector should be able to pop right into your tubing snugly.

If you can not get your connector in right away don't panic! Microwave a cup of water and dip the piping into the hot water. The heat will make the tube expand and you should be able to push the connector in. Once you have one side of the connector filled bend the piping around and put it on the second side. then yahoo you have made your hoop!
 |
| So easy even a 4 year old can do it... |

To secure the connection of the hoop you can use any color electrical tape (I have also used duct tape before but it isn't as smooth a finish). Start by taping around the joint and then begin pulling at an angle to make stripes all around the hoop. You can use more that one color or keep it simple. It is all up to you.


In about twenty minutes we have made all 12 hoops and were ready to send them off to the school for the kids to enjoy.

Happy Hooping! More to come soon.
 |
| Quality control testing |

Comments
Post a Comment